
7 Tips for Buying Antique Stained Glass Panels?

Buying Antique Stained Glass Panels is not simply a matter of choosing beautiful colors. It involves provenance, condition, craftsmanship, and realistic installation costs. The 2024 Art Basel and UBS Global Art Market Report valued global art sales at approximately $65 billion in 2023. However, it does not isolate antique stained glass. That gap matters. Buyers should treat broad market figures as context, not proof of a panel’s value.

Professional conservation guidance offers a safer starting point. The American Institute for Conservation recommends documenting an object’s materials, damage, treatment history, and ownership records before intervention. Historic England’s guidance on traditional glasswork also emphasizes compatible repairs and careful protection of original fabric. These principles apply directly to panels with cracked leading, loose cames, cloudy glass, or later replacements.

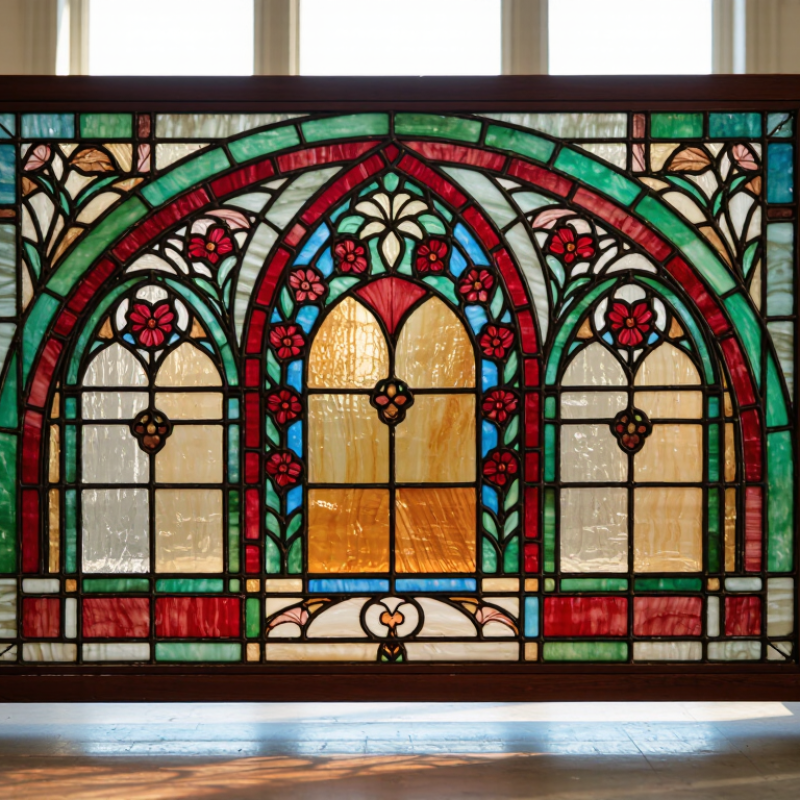
Look closely. Use a bright window.

A genuine panel may show uneven hand-cut edges, subtle bubbles, paint variation, and aging that feels natural rather than manufactured. Yet these signs are not conclusive. Reproductions can imitate them convincingly. Ask for measurements, close-up photographs, ultraviolet-light observations when appropriate, and any available provenance. A reputable dealer should explain uncertainty instead of promising effortless authenticity.

This guide presents seven practical tips for assessing Antique Stained Glass Panels. It considers visual inspection, structural stability, historical evidence, valuation, shipping, installation, and conservation. Some recommendations may feel overly cautious. They are. A beautiful panel can still become an expensive mistake when its frame, glazing method, or repair history remains unclear. Verify every important claim before payment.
7 Tips for Buying Antique Stained Glass Panels?

Define Your Purpose, Style, and Ideal Antique Stained Glass Panel

Buying an antique stained glass panel starts with purpose.

Tip 1: Decide where it will live. A sunlit window needs different protection than a sheltered wall display. Tip 2: Measure the opening carefully, including frame depth and mounting space. Small errors become expensive problems.

Tip 3: Define your style before shopping. Look for Gothic geometry, botanical details, muted cathedral glass, or bold Art Nouveau curves.

Tip 4: Study the colors in natural light. Electric lighting can hide cloudy glass, faded paint, or uneven repairs.

Tip 5: Set a realistic budget. Rare designs cost more, but age alone does not prove quality.

Tip 6: Examine the panel closely. Check the lead lines, solder joints, glass cracks, bowing, and signs of replacement. A little wear can add character. Structural weakness cannot.

Tip 7: Ask for provenance and restoration records. Reliable sellers should explain what they know and admit what remains uncertain. An independent conservator can assess fragile pieces before payment.

I once admired a panel with beautiful amber glass, then noticed its frame was badly warped. I nearly ignored that detail. That would have been a costly mistake. Compare several panels, take clear photographs, and record each measurement. Choose the piece that suits your space, not merely the one with the oldest story.

Verify Age, Origin, Materials, and Authenticity

7 Tips for Buying Antique Stained Glass Panels?

A convincing age claim needs evidence, not just a weathered appearance. Ask for dated photographs, ownership records, or a documented building history. Check whether the panel’s dimensions match its stated origin. A professional appraiser can compare construction methods with regional design practices. Do not rely on a seller’s confidence alone.

Inspect the materials closely. Older panels may show uneven handmade glass, subtle bubbles, tool marks, and varied thickness. Examine the lead came, solder joints, cement, and protective backing. Fresh, uniform materials can suggest restoration or reproduction. However, replacement glass is not automatically a problem. The repair should be clearly recorded. Look for hairline cracks, loose sections, and darkened solder around the edges.

Authenticity depends on the whole panel, not one attractive detail. Compare the glass colors, painted decoration, joinery, and wear patterns. A genuine provenance should connect the panel to a traceable place or collection. Request a written condition report before paying. I once trusted a beautiful patina too quickly; later, inconsistent solder lines raised doubts. My judgment was incomplete. That mistake taught me to photograph every corner, request independent opinions, and accept uncertainty when records are missing. A fair valuation should reflect age, origin, materials, craftsmanship, condition, and documented repairs.

Inspect the Glass, Leading, Frame, and Structural Condition

Tip 1: Inspect the glass in natural daylight. Antique glass may contain bubbles, waviness, seed marks, or uneven color. These details can suggest age, but they do not prove authenticity. Replacement pieces often look too uniform. Shine a flashlight across the surface, not directly through it. Check painted details for flaking, cracks, and cloudy areas. Small chips may remain stable. Spreading fractures deserve caution.

Tip 2: Examine the leading closely. The lead came should hold each piece firmly and follow clean, consistent lines. Soft, twisted, or powdery sections may indicate fatigue. Look at every solder joint for gaps or dark corrosion. Do not press fragile areas. Releading can improve stability, but it also changes historic material. Ask which repairs were completed and when. Records matter. A vague answer should make you pause.

Tip 3: Check the frame and overall structure. A wooden frame may hide rot beneath old paint, while metal frames can develop rust near corners. Look for loose joints, water stains, missing putty, and a panel that rocks on a flat surface. Measure the frame and the glass separately. Installation pressure can worsen slight bowing. My own first impression was once wrong; a minor curve became obvious after fitting. That mistake changed my checklist. A conservator can assess whether dirt is cosmetic or structural. Condition should guide the price, not hopeful descriptions.

Assess Pricing, Provenance, Restoration, and Market Value

7 Tips for Buying Antique Stained Glass Panels

Tip 1: Assess pricing through evidence, not excitement. Compare recent sales of similar panels, considering size, age, condition, subject, and craftsmanship. A small window with rare glass may cost more than a larger, ordinary example. Ask for an itemized price explanation. It should include the panel, frame, and documented restoration.

Tip 2: Examine provenance carefully. Reliable records may include estate papers, architectural photographs, exhibition history, or previous ownership details. Names alone prove little. Match the panel’s measurements and design with each document. Watch for vague claims such as “from an old European house.” Provenance can be incomplete, and that uncertainty should affect the price. I would rather accept an honest gap than a confident story without evidence.

Tip 3: Inspect restoration under clear light. Look for mismatched lead lines, fresh solder, cloudy replacement glass, or uneven cementing. Fine cracks around painted details deserve attention. Ask whether the panel has been releaded, stabilized, or partially rebuilt. Professional conservation reports are useful, but they may not reveal every hidden repair.

Tip 4: Estimate market value realistically. Decorative appeal matters, but resale demand can change quickly. Strong workmanship, documented history, and stable condition usually support value. Oversized panels may attract fewer buyers because shipping and installation are difficult. A dealer’s asking price is not the same as a verified market price. Get an independent appraisal when the cost is substantial. A beautiful panel can still be an expensive mistake.

Indicative USD resale ranges for antique stained-glass panels. Condition, restoration quality, provenance, panel size, craftsmanship, and documented installation history can materially affect the final price. These ranges are market-oriented estimates rather than guaranteed auction results.

Plan Safe Transport, Installation, Care, and Long-Term Preservation

7 Tips for Buying Antique Stained Glass Panels?

Safe transport begins before payment. Ask for close photographs of every crack, bow, missing tie wire, and loose lead joint. A written condition report protects both sides. The National Park Service’s Preservation Brief 34 recommends protective glazing for vulnerable historic glass, with ventilation to reduce trapped condensation. Transport the panel vertically in a rigid, padded crate. Never let foam press directly against painted glass. A vibration logger is useful, though I once trusted packaging alone. That assumption was wrong.

Installation should follow the panel’s existing structure, not force it into a modern opening. Have a conservator inspect the saddle bars, cement, frame, and surrounding masonry. Use reversible supports where possible. Allow small movement from temperature changes. Sealant may look tidy, but it can trap moisture and complicate future repairs. Before drilling, check the load path and photograph every connection. The mistake is usually hidden behind the frame.

For care, use a soft brush and clean water only when a specialist approves it. Avoid household sprays, abrasive cloths, and direct pressure on painted details. The 2021 ASHRAE Handbook gives 30–60% relative humidity as a broad museum guideline. Stable conditions matter more than chasing one perfect number. Install a simple humidity logger nearby. Review readings monthly. Keep indoor temperatures moderate, and block harsh sunlight when fading or heat becomes visible. Inspect joints twice yearly, especially after storms or building movement. Some advice sounds overly cautious. Antique glass rarely forgives rushed decisions.

7 Tips for Buying Antique Stained Glass Panels? - Plan Safe Transport, Installation, Care, and Long-Term Preservation

No. Buying and Preservation Tip Recommended Standard or Measurement Why It Matters Practical Checklist
1 Verify condition before purchase Inspect both sides under natural and angled light. Record cracks, missing glass, loose lead, bowing, solder failures, and previous repairs. Small defects can expand during handling, temperature changes, or installation. Condition documentation also supports insurance and future conservation decisions. Take dated photographs; measure damaged areas; request repair history; avoid panels with active movement unless professional restoration is planned.
2 Confirm size and structural support Measure height, width, thickness, frame depth, and diagonal dimensions. Allow approximately 3–6 mm of clearance per side inside a rigid opening. Glass and lead expand differently from wood, metal, and masonry. A tight fit can create pressure and lead to cracking or distortion. Measure at least three points in each direction; check squareness; identify the load-bearing frame; never use the glass panel as a structural support.
3 Plan safe transport Keep the panel vertical, supported on its strongest edges, and separated from hard surfaces with acid-free foam or clean felt. Flat storage can place stress on weakened lead lines and old solder joints. Vibration, impact, and pressure are common transport hazards. Use a rigid crate or purpose-built frame; add corner protection; prevent movement; label “Fragile—Keep Upright”; avoid direct sunlight and extreme heat during transit.
4 Control the installation environment Maintain a stable indoor environment near 40–60% relative humidity and avoid rapid temperature changes, heating vents, and damp exterior walls. Moisture accelerates corrosion and wood deterioration, while repeated thermal movement can stress glass, putty, lead, and solder connections. Use a hygrometer; inspect for condensation; keep panels away from radiators; provide ventilation behind enclosed installations.
5 Use appropriate glazing and support Install within a stable frame with flexible setting blocks, perimeter support, and a protective secondary glazing layer where appropriate. A secondary barrier can reduce wind pressure, accidental contact, and temperature shock without placing weight directly on the antique panel. Use a qualified stained-glass conservator or installer; ensure drainage; avoid rigid adhesives and direct metal-to-glass contact.
6 Clean gently and infrequently Dust with a soft natural-fiber brush or low-suction vacuum fitted with a screen. For stable glass only, use a slightly damp lint-free cloth and dry immediately. Water and strong cleaners can enter joints, affect old putty, stain porous surfaces, or accelerate corrosion of lead and solder. Test any method in an inconspicuous area; never scrub; avoid ammonia, abrasive powders, steam, soaking, and spraying directly onto the panel.
7 Create a long-term preservation record Photograph the panel at least annually and record humidity, visible changes, repairs, cleaning dates, and any movement or new cracks. A consistent record helps identify gradual deterioration before it becomes an expensive or irreversible failure. Store photographs and measurements securely; review joints and frame condition every 6–12 months; obtain professional assessment when defects increase.
Preservation note: Antique stained glass should be handled as a fragile architectural object. When the lead network is loose, the panel is bowed, or glass is cracked, pause cleaning and installation work and seek an assessment from a qualified conservator.